
Bootstrap 滚动监听+小工具+Flex(弹性)布局+多…
2020-04-20 09:39:24来源:博客园 阅读 ()

Bootstrap 滚动监听+小工具+Flex(弹性)布局+多媒体对象
Bootstrap 滚动监听
<!DOCTYPE html>
<html lang="en">
<head>
    <meta charset="UTF-8">
    <title>demo1</title>
    <meta name="viewport" content="width=device-width, initial-scale=1, shrink-to-fit=no">
    <link rel="stylesheet" href="https://cdn.staticfile.org/twitter-bootstrap/4.3.1/css/bootstrap.min.css">
    <script src="https://cdn.staticfile.org/jquery/3.2.1/jquery.min.js"></script>
    <script src="https://cdn.staticfile.org/popper.js/1.15.0/umd/popper.min.js"></script>
    <script src="https://cdn.staticfile.org/twitter-bootstrap/4.3.1/js/bootstrap.min.js"></script>
    <style>
        body{
            margin:10px;
            padding:10px;
        }
        .navbar-item{flex:1;}
    </style>
</head>
<body data-spy="scroll" data-target=".navbar" data-offset="50" style="position: relative;">
    <nav class="navbar navbar-expand-sm bg-dark navbar-dark fixed-top">
        <ul class="navbar-nav" style="width:100%;">
            <li class="nav-item">
                <a href="#item1" class="nav-link">item1</a>
            </li>
            <li class="nav-item">
                <a href="#item2" class="nav-link">item2</a>
            </li>
            <li class="nav-item">
                <a href="#item3" class="nav-link">item3</a>
            </li>
            <li class="nav-item">
                <a href="#item4" class="nav-link">item4</a>
            </li>
        </ul>
    </nav>

    <div id="item1" class="container-fluid bg-success" style="padding:70px 0">
        <h1>Section 1</h1>
        <p>Try to scroll this section and look at the navigation bar while scrolling! Try to scroll this section and look at the navigation bar while scrolling!</p>
        <p>Try to scroll this section and look at the navigation bar while scrolling! Try to scroll this section and look at the navigation bar while scrolling!</p>
    </div>
    <div id="item2" class="container-fluid bg-warning" style="padding:70px 0">
        <h1>Section 2</h1>
        <p>Try to scroll this section and look at the navigation bar while scrolling! Try to scroll this section and look at the navigation bar while scrolling!</p>
        <p>Try to scroll this section and look at the navigation bar while scrolling! Try to scroll this section and look at the navigation bar while scrolling!</p>
    </div>
    <div id="item3" class="container-fluid bg-danger" style="padding:70px 0">
        <h1>Section 3</h1>
        <p>Try to scroll this section and look at the navigation bar while scrolling! Try to scroll this section and look at the navigation bar while scrolling!</p>
        <p>Try to scroll this section and look at the navigation bar while scrolling! Try to scroll this section and look at the navigation bar while scrolling!</p>
    </div>
    <div id="item4" class="container-fluid bg-info" style="padding:70px 0">
        <h1>Section 4</h1>
        <p>Try to scroll this section and look at the navigation bar while scrolling! Try to scroll this section and look at the navigation bar while scrolling!</p>
        <p>Try to scroll this section and look at the navigation bar while scrolling! Try to scroll this section and look at the navigation bar while scrolling!</p>
    </div>


</body>
</html>

把滚动监听加在body标签上,是正常的
当我尝试加在某个div上时,发现滚动监听似乎无效了
各位有知道原因的么
<!DOCTYPE html>
<html lang="en">
<head>
    <meta charset="UTF-8">
    <title>demo1</title>
    <meta name="viewport" content="width=device-width, initial-scale=1, shrink-to-fit=no">
    <link rel="stylesheet" href="https://cdn.staticfile.org/twitter-bootstrap/4.3.1/css/bootstrap.min.css">
    <script src="https://cdn.staticfile.org/jquery/3.2.1/jquery.min.js"></script>
    <script src="https://cdn.staticfile.org/popper.js/1.15.0/umd/popper.min.js"></script>
    <script src="https://cdn.staticfile.org/twitter-bootstrap/4.3.1/js/bootstrap.min.js"></script>
    <style>
        body{
            margin:10px;
            padding:10px;
        }
        .navbar-item{flex:1;}
    </style>
</head>
<body>

<div data-spy="scroll" data-target=".navbar" data-offset="50" style="width:300px;margin:0 auto;position: relative;">
    <nav class="navbar navbar-expand-sm bg-dark navbar-dark fixed-top" style="width:300px;margin:0 auto;">
        <ul class="navbar-nav" style="width:100%;">
            <li class="nav-item">
                <a href="#item1" class="nav-link">item1</a>
            </li>
            <li class="nav-item">
                <a href="#item2" class="nav-link">item2</a>
            </li>
            <li class="nav-item">
                <a href="#item3" class="nav-link">item3</a>
            </li>
            <li class="nav-item">
                <a href="#item4" class="nav-link">item4</a>
            </li>
        </ul>
    </nav>

    <div id="item1" class="container-fluid bg-success" style="padding:70px 0">
        <h1>Section 1</h1>
        <p>Try to scroll this section and look at the navigation bar while scrolling! Try to scroll this section and look at the navigation bar while scrolling!</p>
        <p>Try to scroll this section and look at the navigation bar while scrolling! Try to scroll this section and look at the navigation bar while scrolling!</p>
    </div>
    <div id="item2" class="container-fluid bg-warning" style="padding:70px 0">
        <h1>Section 2</h1>
        <p>Try to scroll this section and look at the navigation bar while scrolling! Try to scroll this section and look at the navigation bar while scrolling!</p>
        <p>Try to scroll this section and look at the navigation bar while scrolling! Try to scroll this section and look at the navigation bar while scrolling!</p>
    </div>
    <div id="item3" class="container-fluid bg-danger" style="padding:70px 0">
        <h1>Section 3</h1>
        <p>Try to scroll this section and look at the navigation bar while scrolling! Try to scroll this section and look at the navigation bar while scrolling!</p>
        <p>Try to scroll this section and look at the navigation bar while scrolling! Try to scroll this section and look at the navigation bar while scrolling!</p>
    </div>
    <div id="item4" class="container-fluid bg-info" style="padding:70px 0">
        <h1>Section 4</h1>
        <p>Try to scroll this section and look at the navigation bar while scrolling! Try to scroll this section and look at the navigation bar while scrolling!</p>
        <p>Try to scroll this section and look at the navigation bar while scrolling! Try to scroll this section and look at the navigation bar while scrolling!</p>
    </div>

</div>


</body>
</html>
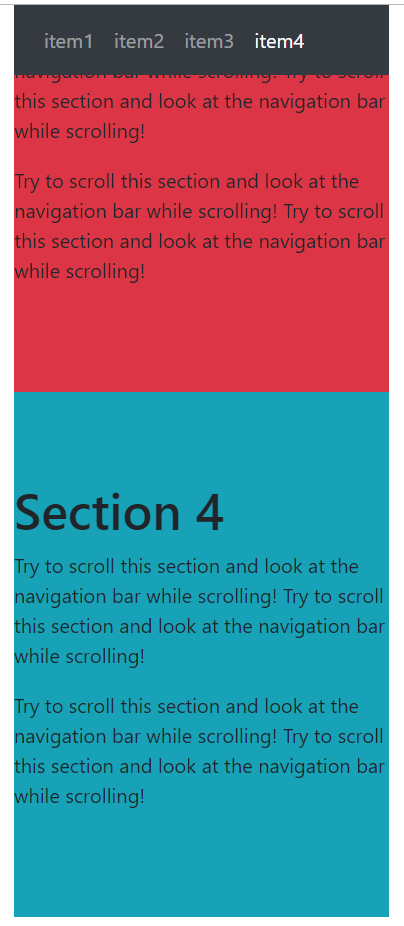
垂直滚动监听:
<!DOCTYPE html>
<html lang="en">
<head>
    <meta charset="UTF-8">
    <title>demo1</title>
    <meta name="viewport" content="width=device-width, initial-scale=1, shrink-to-fit=no">
    <link rel="stylesheet" href="https://cdn.staticfile.org/twitter-bootstrap/4.3.1/css/bootstrap.min.css">
    <script src="https://cdn.staticfile.org/jquery/3.2.1/jquery.min.js"></script>
    <script src="https://cdn.staticfile.org/popper.js/1.15.0/umd/popper.min.js"></script>
    <script src="https://cdn.staticfile.org/twitter-bootstrap/4.3.1/js/bootstrap.min.js"></script>
    <style>
        .nav-pills{
            position:fixed;
            top:20px;
        }
        .col-8 div{
            height:800px;
        }
    </style>
</head>
<body data-spy="scroll" data-target="#navbar" data-offset="1" style="position: relative;">
    <div class="container-fluid">
        <div class="row">
            <nav class="col-4" id="navbar">
                <ul class="nav nav-pills flex-column">
                    <li class="nav-item">
                        <a href="#item1" class="nav-link">item1</a>
                    </li>
                    <li class="nav-item">
                        <a href="#item2" class="nav-link">item2</a>
                    </li>
                    <li class="nav-item">
                        <a href="#item3" class="nav-link">item3</a>
                    </li>
                    <li class="nav-item">
                        <a href="#item4" class="nav-link">item4</a>
                    </li>
                </ul>
            </nav>

            <div class="col-8">
                <div id="item1" class="container-fluid bg-success" style="padding:70px 0">
                    <h1>Section 1</h1>
                    <p>Try to scroll this section and look at the navigation bar while scrolling! Try to scroll this section and look at the navigation bar while scrolling!</p>
                    <p>Try to scroll this section and look at the navigation bar while scrolling! Try to scroll this section and look at the navigation bar while scrolling!</p>
                </div>
                <div id="item2" class="container-fluid bg-warning" style="padding:70px 0">
                    <h1>Section 2</h1>
                    <p>Try to scroll this section and look at the navigation bar while scrolling! Try to scroll this section and look at the navigation bar while scrolling!</p>
                    <p>Try to scroll this section and look at the navigation bar while scrolling! Try to scroll this section and look at the navigation bar while scrolling!</p>
                </div>
                <div id="item3" class="container-fluid bg-danger" style="padding:70px 0">
                    <h1>Section 3</h1>
                    <p>Try to scroll this section and look at the navigation bar while scrolling! Try to scroll this section and look at the navigation bar while scrolling!</p>
                    <p>Try to scroll this section and look at the navigation bar while scrolling! Try to scroll this section and look at the navigation bar while scrolling!</p>
                </div>
                <div id="item4" class="container-fluid bg-info" style="padding:70px 0">
                    <h1>Section 4</h1>
                    <p>Try to scroll this section and look at the navigation bar while scrolling! Try to scroll this section and look at the navigation bar while scrolling!</p>
                    <p>Try to scroll this section and look at the navigation bar while scrolling! Try to scroll this section and look at the navigation bar while scrolling!</p>
                </div>
            </div>
        </div>
    </div>

</body>
</html>

Bootstrap4 小工具
使用 border 类可以添加或移除边框:
<!DOCTYPE html>
<html lang="en">
<head>
    <meta charset="UTF-8">
    <title>demo1</title>
    <meta name="viewport" content="width=device-width, initial-scale=1, shrink-to-fit=no">
    <link rel="stylesheet" href="https://cdn.staticfile.org/twitter-bootstrap/4.3.1/css/bootstrap.min.css">
    <script src="https://cdn.staticfile.org/jquery/3.2.1/jquery.min.js"></script>
    <script src="https://cdn.staticfile.org/popper.js/1.15.0/umd/popper.min.js"></script>
    <script src="https://cdn.staticfile.org/twitter-bootstrap/4.3.1/js/bootstrap.min.js"></script>
    <style>
        div{
            display: inline-block;
            width:100px;
            height:100px;
            margin:20px;
        }
    </style>
</head>
<body>
    <div class="border"></div>
    <div class="border-0"></div>
    <div class="border border-top-0"></div>
    <div class="border border-right-0"></div>
    <div class="border border-bottom-0"></div>
    <div class="border border-left-0"></div>

</body>
</html>

Bootstrap4 提供了一些类来设置边框颜色:
<!DOCTYPE html>
<html lang="en">
<head>
    <meta charset="UTF-8">
    <title>demo1</title>
    <meta name="viewport" content="width=device-width, initial-scale=1, shrink-to-fit=no">
    <link rel="stylesheet" href="https://cdn.staticfile.org/twitter-bootstrap/4.3.1/css/bootstrap.min.css">
    <script src="https://cdn.staticfile.org/jquery/3.2.1/jquery.min.js"></script>
    <script src="https://cdn.staticfile.org/popper.js/1.15.0/umd/popper.min.js"></script>
    <script src="https://cdn.staticfile.org/twitter-bootstrap/4.3.1/js/bootstrap.min.js"></script>
    <style>
        div{
            display: inline-block;
            width:100px;
            height:100px;
            margin:20px;
        }
    </style>
</head>
<body>
    <div class="border border-primary">primary</div>
    <div class="border border-secondary">secondary</div>
    <div class="border border-info">info</div>
    <div class="border border-warning">warning</div>
    <div class="border border-danger">danger</div>
    <div class="border border-success">success</div>
    <div class="border border-light">light</div>
    <div class="border border-dark">dark</div>
    <div class="border border-white">white</div>

</body>
</html>

使用rounded 类可以添加圆角边框:
<!DOCTYPE html>
<html lang="en">
<head>
    <meta charset="UTF-8">
    <title>demo1</title>
    <meta name="viewport" content="width=device-width, initial-scale=1, shrink-to-fit=no">
    <link rel="stylesheet" href="https://cdn.staticfile.org/twitter-bootstrap/4.3.1/css/bootstrap.min.css">
    <script src="https://cdn.staticfile.org/jquery/3.2.1/jquery.min.js"></script>
    <script src="https://cdn.staticfile.org/popper.js/1.15.0/umd/popper.min.js"></script>
    <script src="https://cdn.staticfile.org/twitter-bootstrap/4.3.1/js/bootstrap.min.js"></script>
    <style>
        div{
            display: inline-block;
            width:100px;
            height:100px;
            margin:20px;
        }
    </style>
</head>
<body>
    <div class="rounded border">rounded</div>
    <div class="rounded-top border">rounded-top</div>
    <div class="rounded-bottom border">rounded-bottom</div>
    <div class="rounded-left border">rounded-left</div>
    <div class="rounded-right border">rounded-right</div>
    <div class="rounded-circle border">rounded-circle</div>
    <div class="rouded-0 border">rouded-0</div>

</body>
</html>

.float-right 类用于设置元素右浮动, .float-left 设置元素左浮动, .clearfix 类用于清除浮动:
<!DOCTYPE html>
<html lang="en">
<head>
    <meta charset="UTF-8">
    <title>demo1</title>
    <meta name="viewport" content="width=device-width, initial-scale=1, shrink-to-fit=no">
    <link rel="stylesheet" href="https://cdn.staticfile.org/twitter-bootstrap/4.3.1/css/bootstrap.min.css">
    <script src="https://cdn.staticfile.org/jquery/3.2.1/jquery.min.js"></script>
    <script src="https://cdn.staticfile.org/popper.js/1.15.0/umd/popper.min.js"></script>
    <script src="https://cdn.staticfile.org/twitter-bootstrap/4.3.1/js/bootstrap.min.js"></script>
    <style>
        .box{
            width:100px;
            height:100px;
        }
    </style>
</head>
<body>
    <div class="clearfix">
        <div class="box border float-left">float-left</div>
        <div class="box border float-right">float-right</div>
    </div>


</body>
</html>

设置浮动 (.float-*-left|right - * 为 sm, md, lg 或 xl)的方向依赖于屏幕的大小:
<!DOCTYPE html>
<html lang="en">
<head>
    <meta charset="UTF-8">
    <title>demo1</title>
    <meta name="viewport" content="width=device-width, initial-scale=1, shrink-to-fit=no">
    <link rel="stylesheet" href="https://cdn.staticfile.org/twitter-bootstrap/4.3.1/css/bootstrap.min.css">
    <script src="https://cdn.staticfile.org/jquery/3.2.1/jquery.min.js"></script>
    <script src="https://cdn.staticfile.org/popper.js/1.15.0/umd/popper.min.js"></script>
    <script src="https://cdn.staticfile.org/twitter-bootstrap/4.3.1/js/bootstrap.min.js"></script>
    <style>
        .box{
            width:100px;
            height:100px;
        }
    </style>
</head>
<body>
    <!-- 设置响应式浮动 -->
    <div class="clearfix">
        <div class="box border float-md-right">在大于中等屏幕尺寸上右浮动</div>
    </div>

</body>
</html>
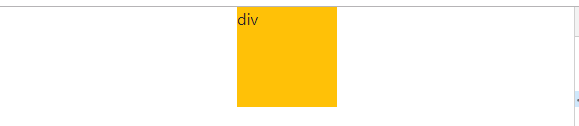
使用 .mx-auto 类来设置居中对齐:
<div class="box mx-auto bg-warning">div</div>
使用 w-* 类 (.w-25, .w-50, .w-75, .w-100, .mw-100) 来设置宽度:
<!DOCTYPE html>
<html lang="en">
<head>
    <meta charset="UTF-8">
    <title>demo1</title>
    <meta name="viewport" content="width=device-width, initial-scale=1, shrink-to-fit=no">
    <link rel="stylesheet" href="https://cdn.staticfile.org/twitter-bootstrap/4.3.1/css/bootstrap.min.css">
    <script src="https://cdn.staticfile.org/jquery/3.2.1/jquery.min.js"></script>
    <script src="https://cdn.staticfile.org/popper.js/1.15.0/umd/popper.min.js"></script>
    <script src="https://cdn.staticfile.org/twitter-bootstrap/4.3.1/js/bootstrap.min.js"></script>
    <style>
        div{
            margin-bottom:10px;
        }
    </style>
</head>
<body>
    <div class="w-25 bg-warning">25%</div>
    <div class="w-50 bg-warning">50%</div>
    <div class="w-100 bg-warning">100%</div>
    <div class="mw-80 bg-warning">最大80%</div>
</body>
</html>
最大宽度没生效,是这么用的么??
使用 h-* 类 (.h-25, .h-50, .h-75, .h-100, .mh-100) 来设置高度:
<!DOCTYPE html>
<html lang="en">
<head>
    <meta charset="UTF-8">
    <title>demo1</title>
    <meta name="viewport" content="width=device-width, initial-scale=1, shrink-to-fit=no">
    <link rel="stylesheet" href="https://cdn.staticfile.org/twitter-bootstrap/4.3.1/css/bootstrap.min.css">
    <script src="https://cdn.staticfile.org/jquery/3.2.1/jquery.min.js"></script>
    <script src="https://cdn.staticfile.org/popper.js/1.15.0/umd/popper.min.js"></script>
    <script src="https://cdn.staticfile.org/twitter-bootstrap/4.3.1/js/bootstrap.min.js"></script>
    <style>
        .container{
            height:300px;
        }
        div{
            margin-right:10px;
        }
    </style>
</head>
<body>
    <div class="container">
        <div class="float-left h-25 bg-warning">25%</div>
        <div class="float-left h-50 bg-warning">50%</div>
        <div class="float-left h-100 bg-warning">100%</div>
        <div class="float-left mh-80 bg-warning" style="height:300px;">最大80%</div>
    </div>
</body>
</html>

不是很懂这个最大宽度和最大高度的原理……
Bootstrap 4 Flex(弹性)布局
注意:IE9 及其以下版本不支持弹性盒子,所以如果你需要兼容 IE8-9,请使用 Bootstrap 3
    <div class="d-flex p-3 bg-dark">
        <div class="p-2 bg-warning">bg-warning</div>
        <div class="p-2 bg-info">bg-info</div>
        <div class="p-2 bg-danger">bg-danger</div>
    </div>

创建显示在同一行上的弹性盒子容器可以使用 d-inline-flex 类:
    <div class="d-inline-flex p-3 bg-dark">
        <div class="p-2 bg-warning">bg-warning</div>
        <div class="p-2 bg-info">bg-info</div>
        <div class="p-2 bg-danger">bg-danger</div>
    </div>

.flex-row 可以设置弹性子元素水平显示,这是默认的。
使用 .flex-row-reverse 类用于设置右对齐显示,即与 .flex-row 方向相反。
    <div class="d-flex p-3 bg-dark">
        <div class="p-2 bg-warning">flex box1</div>
        <div class="p-2 bg-info">flex box1</div>
        <div class="p-2 bg-danger">flex box3</div>
    </div>

    <div class="d-flex p-3 bg-dark flex-row">
        <div class="p-2 bg-warning">flex box1</div>
        <div class="p-2 bg-info">flex box1</div>
        <div class="p-2 bg-danger">flex box3</div>
    </div>

    <div class="d-flex p-3 bg-dark flex-row-reverse">
        <div class="p-2 bg-warning">flex box1</div>
        <div class="p-2 bg-info">flex box1</div>
        <div class="p-2 bg-danger">flex box3</div>
    </div>

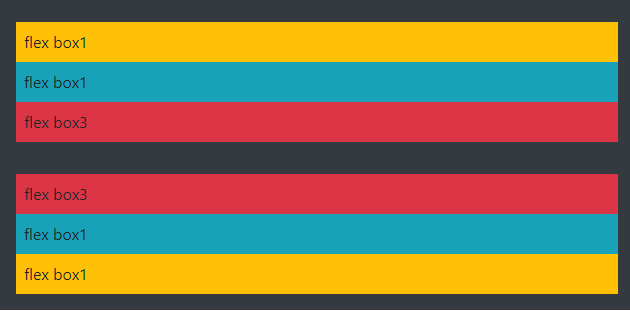
.flex-column 类用于设置弹性子元素垂直方向显示, .flex-column-reverse 用于翻转子元素:
    <div class="d-flex p-3 bg-dark flex-column">
        <div class="p-2 bg-warning">flex box1</div>
        <div class="p-2 bg-info">flex box1</div>
        <div class="p-2 bg-danger">flex box3</div>
    </div>

    <div class="d-flex p-3 bg-dark flex-column-reverse">
        <div class="p-2 bg-warning">flex box1</div>
        <div class="p-2 bg-info">flex box1</div>
        <div class="p-2 bg-danger">flex box3</div>
    </div>
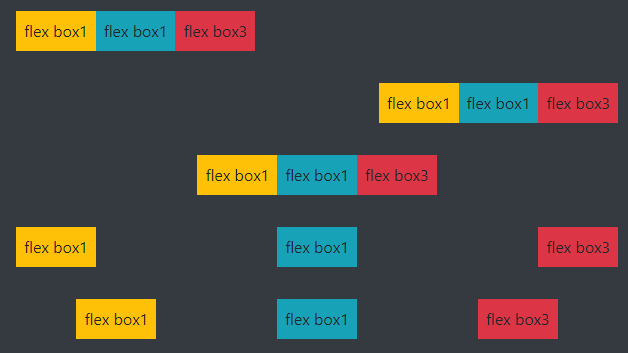
.justify-content-* 类用于修改弹性子元素的排列方式,* 号允许的值有:start (默认), end, center, between 或 around:
    <div class="d-flex p-3 bg-dark justify-content-start">
        <div class="p-2 bg-warning">flex box1</div>
        <div class="p-2 bg-info">flex box1</div>
        <div class="p-2 bg-danger">flex box3</div>
    </div>

    <div class="d-flex p-3 bg-dark justify-content-end">
        <div class="p-2 bg-warning">flex box1</div>
        <div class="p-2 bg-info">flex box1</div>
        <div class="p-2 bg-danger">flex box3</div>
    </div>

    <div class="d-flex p-3 bg-dark justify-content-center">
        <div class="p-2 bg-warning">flex box1</div>
        <div class="p-2 bg-info">flex box1</div>
        <div class="p-2 bg-danger">flex box3</div>
    </div>

    <div class="d-flex p-3 bg-dark justify-content-between">
        <div class="p-2 bg-warning">flex box1</div>
        <div class="p-2 bg-info">flex box1</div>
        <div class="p-2 bg-danger">flex box3</div>
    </div>

    <div class="d-flex p-3 bg-dark justify-content-around">
        <div class="p-2 bg-warning">flex box1</div>
        <div class="p-2 bg-info">flex box1</div>
        <div class="p-2 bg-danger">flex box3</div>
    </div>
.flex-fill 类强制设置各个弹性子元素的宽度是一样的:(填满剩余空间)
    <div class="d-flex p-3 bg-dark">
        <div class="p-2 bg-warning">flex box1</div>
        <div class="p-2 bg-info">flex box2</div>
        <div class="p-2 bg-danger">flex box3</div>
    </div>

    <div class="d-flex p-3 bg-dark">
        <div class="p-2 bg-warning flex-fill">flex box1</div>
        <div class="p-2 bg-info flex-fill">flex box2</div>
        <div class="p-2 bg-danger flex-fill">flex box3</div>
    </div>

.flex-grow-1 用于设置子元素使用剩下的空间。以下实例中两个子元素只设置了它们所需要的空间,中间一个获取剩余空间。
    <div class="d-flex p-3 bg-dark">
        <div class="p-2 bg-warning">flex box1</div>
        <div class="p-2 bg-info flex-grow-1">flex box2</div>
        <div class="p-2 bg-danger">flex box3</div>
    </div>

使用 .flex-shrink-1 用于设置子元素的收缩规则。
.order 类可以设置弹性子元素的排序,从 .order-1 到 .order-12,数字越低权重越高( .order-1 排在 .order-2 之前) :
    <div class="d-flex p-3 bg-dark">
        <div class="p-2 bg-warning order-2">flex box1</div>
        <div class="p-2 bg-info order-3">flex box2</div>
        <div class="p-2 bg-danger order-1">flex box3</div>
    </div>

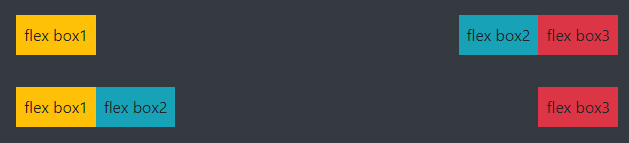
.mr-auto 类可以设置子元素右外边距为 auto,即 margin-right: auto!important;,.ml-auto 类可以设置子元素左外边距为 auto,即 margin-left: auto!important;:
    <div class="d-flex p-3 bg-dark">
        <div class="p-2 mr-auto bg-warning">flex box1</div>
        <div class="p-2 bg-info">flex box2</div>
        <div class="p-2 bg-danger">flex box3</div>
    </div>

    <div class="d-flex p-3 bg-dark">
        <div class="p-2 bg-warning">flex box1</div>
        <div class="p-2 bg-info">flex box2</div>
        <div class="p-2 ml-auto bg-danger">flex box3</div>
    </div>
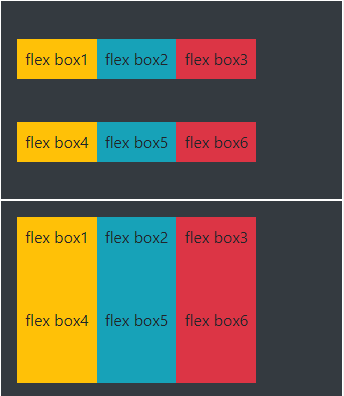
弹性容器中包裹子元素可以使用以下三个类: .flex-nowrap (默认), .flex-wrap 或 .flex-wrap-reverse。设置 flex 容器是单行或者多行
    <div class="d-flex p-3 bg-dark flex-wrap">
        <div class="p-2 bg-warning">flex box1</div>
        <div class="p-2 bg-info">flex box2</div>
        <div class="p-2 bg-danger">flex box3</div>
        <div class="p-2 bg-warning">flex box4</div>
        <div class="p-2 bg-info">flex box5</div>
        <div class="p-2 bg-danger">flex box6</div>
    </div>

    <div class="d-flex p-3 bg-dark flex-wrap-reverse">
        <div class="p-2 bg-warning">flex box1</div>
        <div class="p-2 bg-info">flex box2</div>
        <div class="p-2 bg-danger">flex box3</div>
        <div class="p-2 bg-warning">flex box4</div>
        <div class="p-2 bg-info">flex box5</div>
        <div class="p-2 bg-danger">flex box6</div>
    </div>

    <div class="d-flex p-3 bg-dark flex-nowrap">
        <div class="p-2 bg-warning">flex box1</div>
        <div class="p-2 bg-info">flex box2</div>
        <div class="p-2 bg-danger">flex box3</div>
        <div class="p-2 bg-warning">flex box4</div>
        <div class="p-2 bg-info">flex box5</div>
        <div class="p-2 bg-danger">flex box6</div>
    </div>

使用 .align-content-* 来控制在垂直方向上如何去堆叠子元素,包含的值有:.align-content-start (默认), .align-content-end, .align-content-center, .align-content-between, .align-content-around 和 .align-content-stretch。
这些类在只有一行的弹性子元素中是无效的
<!DOCTYPE html>
<html lang="en">
<head>
    <meta charset="UTF-8">
    <title>demo1</title>
    <meta name="viewport" content="width=device-width, initial-scale=1, shrink-to-fit=no">
    <link rel="stylesheet" href="https://cdn.staticfile.org/twitter-bootstrap/4.3.1/css/bootstrap.min.css">
    <script src="https://cdn.staticfile.org/jquery/3.2.1/jquery.min.js"></script>
    <script src="https://cdn.staticfile.org/popper.js/1.15.0/umd/popper.min.js"></script>
    <script src="https://cdn.staticfile.org/twitter-bootstrap/4.3.1/js/bootstrap.min.js"></script>
    <style>
        .d-flex{height:200px;}
    </style>
</head>
<body>

    <div class="d-flex p-3 bg-dark flex-wrap align-content-start border border-white">
        <div class="p-2 bg-warning">flex box1</div>
        <div class="p-2 bg-info">flex box2</div>
        <div class="p-2 bg-danger">flex box3</div>
        <div class="p-2 bg-warning">flex box4</div>
        <div class="p-2 bg-info">flex box5</div>
        <div class="p-2 bg-danger">flex box6</div>
    </div>

    <div class="d-flex p-3 bg-dark flex-wrap align-content-end border border-white">
        <div class="p-2 bg-warning">flex box1</div>
        <div class="p-2 bg-info">flex box2</div>
        <div class="p-2 bg-danger">flex box3</div>
        <div class="p-2 bg-warning">flex box4</div>
        <div class="p-2 bg-info">flex box5</div>
        <div class="p-2 bg-danger">flex box6</div>
    </div>

    <div class="d-flex p-3 bg-dark flex-wrap align-content-center border border-white">
        <div class="p-2 bg-warning">flex box1</div>
        <div class="p-2 bg-info">flex box2</div>
        <div class="p-2 bg-danger">flex box3</div>
        <div class="p-2 bg-warning">flex box4</div>
        <div class="p-2 bg-info">flex box5</div>
        <div class="p-2 bg-danger">flex box6</div>
    </div>

    <div class="d-flex p-3 bg-dark flex-wrap align-content-around border border-white">
        <div class="p-2 bg-warning">flex box1</div>
        <div class="p-2 bg-info">flex box2</div>
        <div class="p-2 bg-danger">flex box3</div>
        <div class="p-2 bg-warning">flex box4</div>
        <div class="p-2 bg-info">flex box5</div>
        <div class="p-2 bg-danger">flex box6</div>
    </div>

    <div class="d-flex p-3 bg-dark flex-wrap align-content-stretch border border-white">
        <div class="p-2 bg-warning">flex box1</div>
        <div class="p-2 bg-info">flex box2</div>
        <div class="p-2 bg-danger">flex box3</div>
        <div class="p-2 bg-warning">flex box4</div>
        <div class="p-2 bg-info">flex box5</div>
        <div class="p-2 bg-danger">flex box6</div>
    </div>


</body>
</html>

如果要设置单行的子元素对齐可以使用 .align-items-* 类来控制,包含的值有:.align-items-start, .align-items-end, .align-items-center, .align-items-baseline, 和 .align-items-stretch (默认)。
    <div class="d-flex p-3 bg-dark align-items-start border border-white">
        <div class="p-2 bg-warning">flex box1</div>
        <div class="p-2 bg-info">flex box2</div>
        <div class="p-2 bg-danger">flex box3</div>
        <div class="p-2 bg-warning">flex box4</div>
        <div class="p-2 bg-info">flex box5</div>
        <div class="p-2 bg-danger">flex box6</div>
    </div>

    <div class="d-flex p-3 bg-dark align-items-end border border-white">
        <div class="p-2 bg-warning">flex box1</div>
        <div class="p-2 bg-info">flex box2</div>
        <div class="p-2 bg-danger">flex box3</div>
        <div class="p-2 bg-warning">flex box4</div>
        <div class="p-2 bg-info">flex box5</div>
        <div class="p-2 bg-danger">flex box6</div>
    </div>

    <div class="d-flex p-3 bg-dark align-items-center border border-white">
        <div class="p-2 bg-warning">flex box1</div>
        <div class="p-2 bg-info">flex box2</div>
        <div class="p-2 bg-danger">flex box3</div>
        <div class="p-2 bg-warning">flex box4</div>
        <div class="p-2 bg-info">flex box5</div>
        <div class="p-2 bg-danger">flex box6</div>
    </div>

    <div class="d-flex p-3 bg-dark align-items-around border border-white">
        <div class="p-2 bg-warning">flex box1</div>
        <div class="p-2 bg-info">flex box2</div>
        <div class="p-2 bg-danger">flex box3</div>
        <div class="p-2 bg-warning">flex box4</div>
        <div class="p-2 bg-info">flex box5</div>
        <div class="p-2 bg-danger">flex box6</div>
    </div>

    <div class="d-flex p-3 bg-dark align-items-stretch border border-white">
        <div class="p-2 bg-warning">flex box1</div>
        <div class="p-2 bg-info">flex box2</div>
        <div class="p-2 bg-danger">flex box3</div>
        <div class="p-2 bg-warning">flex box4</div>
        <div class="p-2 bg-info">flex box5</div>
        <div class="p-2 bg-danger">flex box6</div>
    </div>

如果要设置指定子元素对齐对齐可以使用 .align-self-* 类来控制,包含的值有:.align-self-start, .align-self-end, .align-self-center, .align-self-baseline, 和 .align-self-stretch (默认)。
    <div class="d-flex p-3 bg-dark border border-white">
        <div class="p-2 bg-warning">flex box1</div>
        <div class="p-2 bg-info">flex box2</div>
        <div class="p-2 bg-danger align-self-start">flex box3</div>
        <div class="p-2 bg-warning">flex box4</div>
        <div class="p-2 bg-info">flex box5</div>
        <div class="p-2 bg-danger">flex box6</div>
    </div>

    <div class="d-flex p-3 bg-dark border border-white">
        <div class="p-2 bg-warning">flex box1</div>
        <div class="p-2 bg-info">flex box2</div>
        <div class="p-2 bg-danger align-self-end">flex box3</div>
        <div class="p-2 bg-warning">flex box4</div>
        <div class="p-2 bg-info">flex box5</div>
        <div class="p-2 bg-danger">flex box6</div>
    </div>

    <div class="d-flex p-3 bg-dark border border-white">
        <div class="p-2 bg-warning">flex box1</div>
        <div class="p-2 bg-info">flex box2</div>
        <div class="p-2 bg-danger align-self-center">flex box3</div>
        <div class="p-2 bg-warning">flex box4</div>
        <div class="p-2 bg-info">flex box5</div>
        <div class="p-2 bg-danger">flex box6</div>
    </div>

    <div class="d-flex p-3 bg-dark border border-white">
        <div class="p-2 bg-warning">flex box1</div>
        <div class="p-2 bg-info">flex box2</div>
        <div class="p-2 bg-danger align-self-around">flex box3</div>
        <div class="p-2 bg-warning">flex box4</div>
        <div class="p-2 bg-info">flex box5</div>
        <div class="p-2 bg-danger">flex box6</div>
    </div>

    <div class="d-flex p-3 bg-dark border border-white">
        <div class="p-2 bg-warning">flex box1</div>
        <div class="p-2 bg-info">flex box2</div>
        <div class="p-2 bg-danger align-self-stretch">flex box3</div>
        <div class="p-2 bg-warning">flex box4</div>
        <div class="p-2 bg-info">flex box5</div>
        <div class="p-2 bg-danger">flex box6</div>
    </div>

响应式flex类:
可以根据不同的设备,设置 flex 类,从而实现页面响应式布局,以下表格中的 * 号可以的值有:sm, md, lg 或 xl, 对应的是小型设备、中型设备,大型设备,超大型设备。
https://www.runoob.com/bootstrap4/bootstrap4-flex.html 菜鸟笔记最下面写的很清楚,要用了就去翻翻
Bootstrap 4 多媒体对象
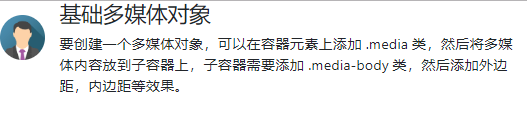
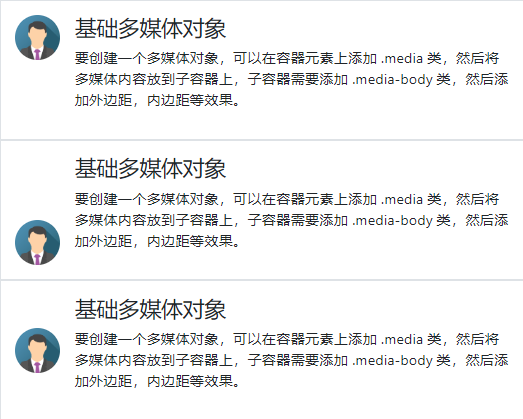
要创建一个多媒体对象,可以在容器元素上添加 .media 类,然后将多媒体内容放到子容器上,子容器需要添加 .media-body 类,然后添加外边距,内边距等效果:
    <div class="media border p-3">
        <img src="img/img_avatar.png" class="mr-3 mt-3 rounded-circle" style="width:50px;">
        <div class="media-body">
            <h4>基础多媒体对象</h4>
            <p>要创建一个多媒体对象,可以在容器元素上添加 .media 类,然后将多媒体内容放到子容器上,子容器需要添加 .media-body 类,然后添加外边距,内边距等效果。</p>
        </div>
    </div>
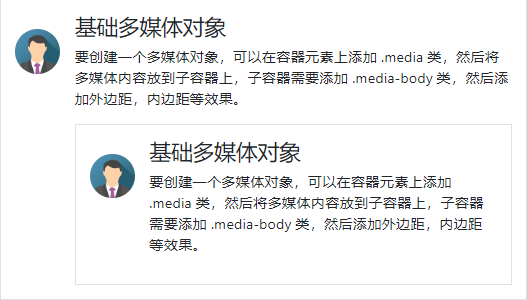
多媒体对象可以多个嵌套(一个多媒体对象中包含另外一个多媒体对象)
要嵌套多媒体对象,可以把新的 .media 容器放到 .media-body 容器中:
    <div class="media border p-3">
        <img src="img/img_avatar.png" class="mr-3 mt-3 rounded-circle" style="width:50px;">
        <div class="media-body">
            <h4>基础多媒体对象</h4>
            <p>要创建一个多媒体对象,可以在容器元素上添加 .media 类,然后将多媒体内容放到子容器上,子容器需要添加 .media-body 类,然后添加外边距,内边距等效果。</p>
            <div class="media border p-3">
                <img src="img/img_avatar.png" class="mr-3 mt-3 rounded-circle" style="width:50px;">
                <div class="media-body">
                    <h4>基础多媒体对象</h4>
                    <p>要创建一个多媒体对象,可以在容器元素上添加 .media 类,然后将多媒体内容放到子容器上,子容器需要添加 .media-body 类,然后添加外边距,内边距等效果。</p>
                </div>
            </div>
        </div>
    </div>
如果你想将头像图片显示在右侧,可以在 .media-body 容器后添加图片:
    <div class="media border p-3">
        <div class="media-body">
            <h4>基础多媒体对象</h4>
            <p>要创建一个多媒体对象,可以在容器元素上添加 .media 类,然后将多媒体内容放到子容器上,子容器需要添加 .media-body 类,然后添加外边距,内边距等效果。</p>
        </div>
        <img src="img/img_avatar.png" class="mr-3 mt-3 rounded-circle" style="width:50px;">
    </div>


可以使用 align-self-* 相关类来设置多媒体对象的图片显示位置:
(垂直方向)
    <div class="media border p-3">
        <img src="img/img_avatar.png" class="align-self-start mr-3 rounded-circle" style="width:50px;">
        <div class="media-body">
            <h4>基础多媒体对象</h4>
            <p>要创建一个多媒体对象,可以在容器元素上添加 .media 类,然后将多媒体内容放到子容器上,子容器需要添加 .media-body 类,然后添加外边距,内边距等效果。</p>
        </div>
    </div>

    <div class="media border p-3">
        <img src="img/img_avatar.png" class="align-self-end mr-3 rounded-circle" style="width:50px;">
        <div class="media-body">
            <h4>基础多媒体对象</h4>
            <p>要创建一个多媒体对象,可以在容器元素上添加 .media 类,然后将多媒体内容放到子容器上,子容器需要添加 .media-body 类,然后添加外边距,内边距等效果。</p>
        </div>
    </div>

    <div class="media border p-3">
        <img src="img/img_avatar.png" class="align-self-center mr-3 rounded-circle" style="width:50px;">
        <div class="media-body">
            <h4>基础多媒体对象</h4>
            <p>要创建一个多媒体对象,可以在容器元素上添加 .media 类,然后将多媒体内容放到子容器上,子容器需要添加 .media-body 类,然后添加外边距,内边距等效果。</p>
        </div>
    </div>
Bootstrap4 创建一个网页
<!DOCTYPE html>
<html lang="en">
<head>
    <meta charset="UTF-8">
    <title>demo1</title>
    <meta name="viewport" content="width=device-width, initial-scale=1, shrink-to-fit=no">
    <link rel="stylesheet" href="https://cdn.staticfile.org/twitter-bootstrap/4.3.1/css/bootstrap.min.css">
    <script src="https://cdn.staticfile.org/jquery/3.2.1/jquery.min.js"></script>
    <script src="https://cdn.staticfile.org/popper.js/1.15.0/umd/popper.min.js"></script>
    <script src="https://cdn.staticfile.org/twitter-bootstrap/4.3.1/js/bootstrap.min.js"></script>
    <style>

    </style>
</head>
<body>

    <div class="jumbotron text-center" style="margin-bottom:0;">
        <h1>我的第一个 Bootstrap 4 页面</h1>
          <p>重置浏览器窗口大小查看效果!</p>
    </div>

    <nav class="navbar navbar-expand-sm bg-dark navbar-dark">
      <a class="navbar-brand" href="#">导航</a>
      <button class="navbar-toggler" type="button" data-toggle="collapse" data-target="#collapsibleNavbar">
        <span class="navbar-toggler-icon"></span>
      </button>
      <div class="collapse navbar-collapse" id="collapsibleNavbar">
        <ul class="navbar-nav">
          <li class="nav-item">
            <a class="nav-link" href="#">链接</a>
          </li>
          <li class="nav-item">
            <a class="nav-link" href="#">链接</a>
          </li>
          <li class="nav-item">
            <a class="nav-link" href="#">链接</a>
          </li>
        </ul>
      </div>
    </nav>

    <div class="container">
        <div class="row">
            <div class="col-sm-4">
                about me
                <ul class="nav nav-pills flex-column">
                    <li class="nav-item">
                      <a class="nav-link active" href="#">激活状态</a>
                    </li>
                    <li class="nav-item">
                      <a class="nav-link" href="#">链接</a>
                    </li>
                    <li class="nav-item">
                      <a class="nav-link" href="#">链接</a>
                    </li>
                    <li class="nav-item">
                      <a class="nav-link disabled" href="#">禁用</a>
                    </li>
                 </ul>
                 <hr class="d-sm-none">
            </div>
            <div class="col-sm-8">
                ...
            </div>
        </div>
    </div>

    <div class="jumbotron text-center" style="margin-bottom:0">
      <p>footer</p>
    </div>

</body>
</html>

好丑……
原文链接:https://www.cnblogs.com/chenyingying0/p/12736533.html
如有疑问请与原作者联系
标签:
版权申明:本站文章部分自网络,如有侵权,请联系:west999com@outlook.com
特别注意:本站所有转载文章言论不代表本站观点,本站所提供的摄影照片,插画,设计作品,如需使用,请与原作者联系,版权归原作者所有

下一篇:HTML连载84-添加中部的图片
- Bootstrap4 轮播+模态框+提示框+弹出框 2020-04-16
- Bootstrap4 面包屑导航+表单+输入框组+自定义表单 2020-04-16
- Bootstrap4 卡片+下拉菜单+折叠+导航+导航栏 2020-04-16
- Bootstrap4 按钮组+徽章(Badges)+进度条+分页+列表组 2020-04-16
- Bootstrap4 表格练习 2020-04-15
IDC资讯: 主机资讯 注册资讯 托管资讯 vps资讯 网站建设
网站运营: 建站经验 策划盈利 搜索优化 网站推广 免费资源
网络编程: Asp.Net编程 Asp编程 Php编程 Xml编程 Access Mssql Mysql 其它
服务器技术: Web服务器 Ftp服务器 Mail服务器 Dns服务器 安全防护
软件技巧: 其它软件 Word Excel Powerpoint Ghost Vista QQ空间 QQ FlashGet 迅雷
网页制作: FrontPages Dreamweaver Javascript css photoshop fireworks Flash
